Wednesday, 20 April 2011

Fire Komon @ Mr. Gay Europe!

Hello everyone!

This past weekend was a very good one for me! Not only did I manage to visit my hometown after more than 4 years, but it was also the first time I got to dress-up ever since I was 5 or 6, when all this started :))

As some of you know from my facebook page, last weekend Mr. Gay Europe was held in the lovely Poiana Brasov ski resort... where there was a lot of snow.. for the whole weekend!!! Mr. Gay Italy won the competition. Well deserved, although I had a secret crush on Mr. Gay Ireland...

Deciding on my outfit was a complete fuss. I initially wanted to wear my early showa komon, then made plans for my furisode with musubi and all, and then finally decided on my fire-red komon with a very cute fan design, with my black based nagoya obi with kikko patterned clouds, hot orange obijime and pale pink ougi obiage.

This is the final result:


I look almost skinny in the pic below:


and something about his bow tie made me think i'd look good in a pic next to him:


All in all I had a wonderful time there! Aaand, I also wore my yellow, gold and silver saree:


I really missed my hometown.. so spending 3 days there was a complete and utter bliss!

Sunday, 27 February 2011

Tsukuri/Tsuke/Easy Obi part II

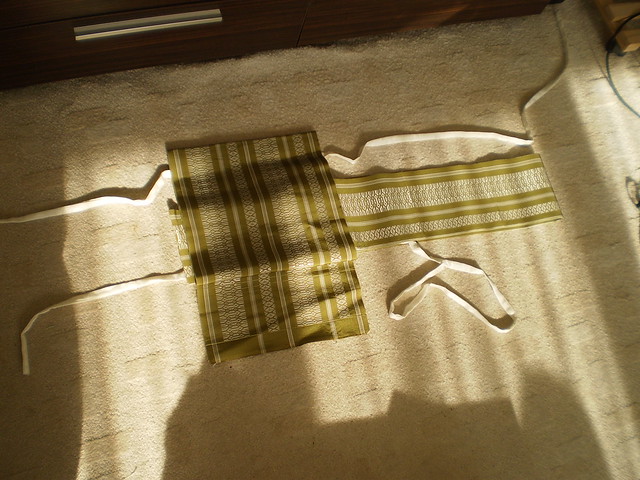
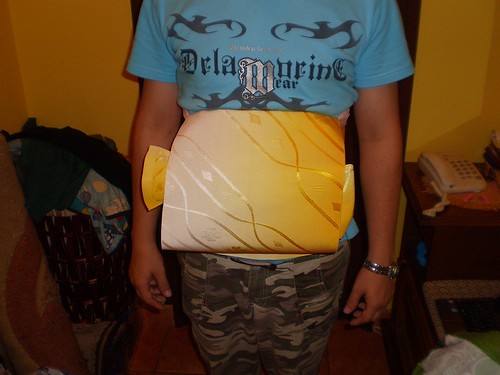
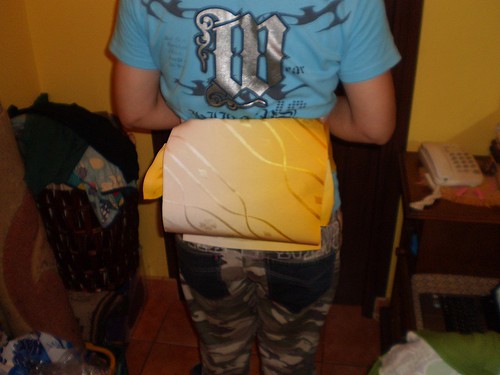
So I finished the sewing part of it!


Now will come the hard part: finding ways of wearing it into a musubi other than the otaiko. I'll keep you posted with whatever comes to mind!

Wednesday, 2 February 2011

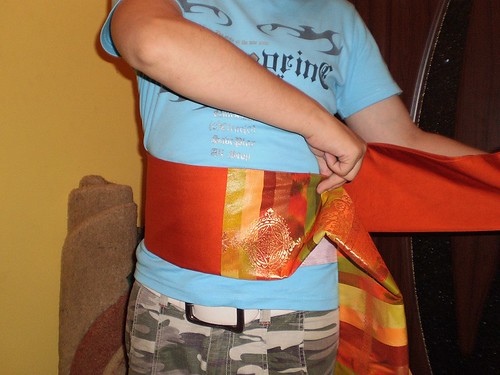
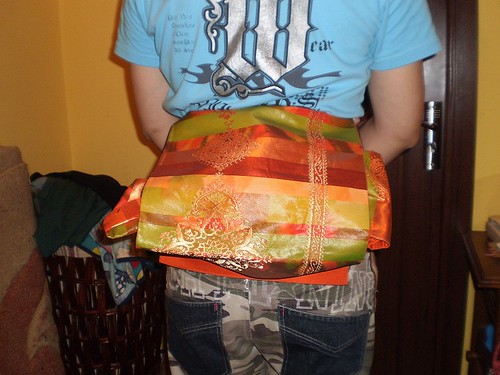
Tsukuri/Tsuke/Easy Obi

After a long quarrel with myself, I finally decided it was time to cut my olive hakata obi and turn it into an easy obi.

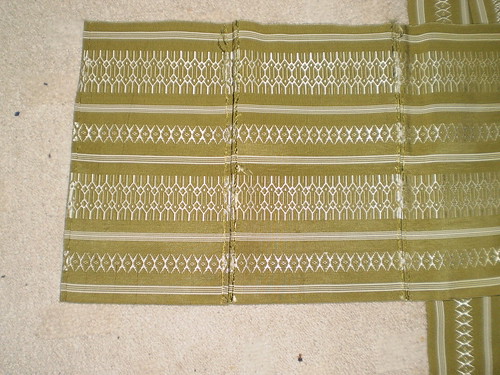
There are 2 reasons that led to this decision: 1. too short for any proper musubi kitsuke and 2. the tesaki part seems to have been first cut to pieces and then resewn together (see below).

tesaki part cut and resewn

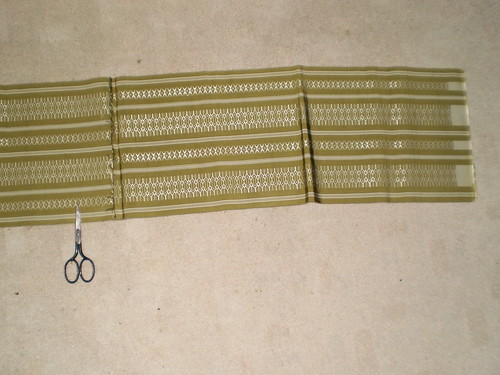
So, the first thing I did was to measure how much would I need for the otaiko part (initial taresaki part). It worked out to be about 110 cm, which was about the same as the reinforced, 2 layer part:

that's where I did my first cut
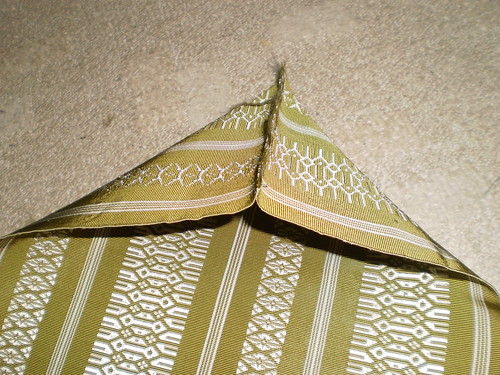
Then I folded the rest of the obi in half, on the wrong side, and sewn each end, like this:


then turned it around on the good side:


So far, the halfwidth part of my easy obi is done. I am still debating whether to add strings to it or just leave it as is and use those obi metal clips to hold it wrapped around the waist. We'll see which one works better.

Still to finish is the otaiko part. To that I will just hem the cut side, and then add the strings. I'll get back with the finished product. I promise!


Sunday, 30 January 2011

nontraditional kitsuke


PC080009
Originally uploaded by ume bloom
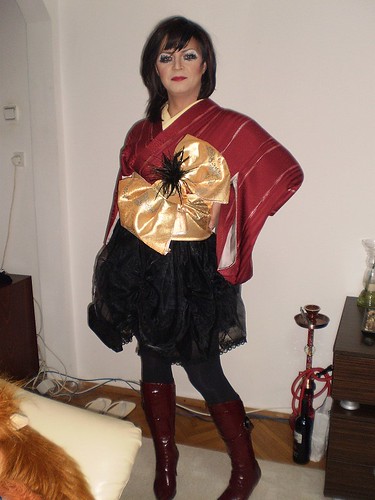
Last night, while browsing youtube, found a makeup tutorial which immediately made me think "go punk!"... So I did!

I paired my omeshi yabane komon, the pale yellow haneri I got from a fellow IG member, with the golden karakusa fukuro obi... and a 3-layer skirt... and boots... and feathers...

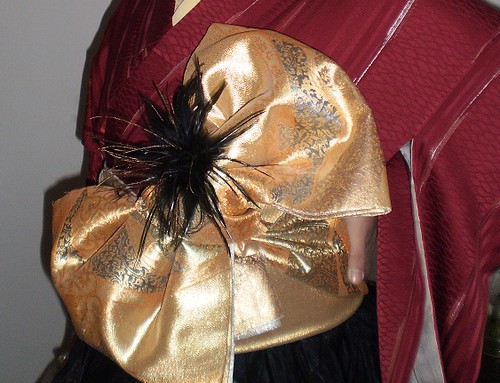
I got all crazy and then... bang! It hit me to try and do the musubi in the front... I *was* going clubbing after all.

So there you have it: punk make-up (I love it, btw!), non-traditional kitsuke AND musubi in the front... Can it get more scandalous than that..? Oh yeah.. Forgot to take a pic of my collar.... really low tonight.
More pics:

The entire outfit:


the front musubi with the feather accent:


Any good? :)

Wednesday, 26 January 2011

ume no houmongi


houmongi
Originally uploaded by ume bloom
Yaaaaaay! I finally got to wear the houmngi I bought last summer!

paired with my golden karabana fukuro obi, red& blue shibori obiage, asanoha date-eri and navy obijime. The outfit *screamed* for some salmon pink accesory, but alas, I have none so far... so I went ahead and worked with what's in my tansu so far. More pics on my flickr account!

I did feel good wearing this outfit though... Maybe because it's been sitting in my tansu for over 6 months now and every time I saw it I'd say "anytime now - just wait for a bit of real snow outside".. Or even because I haven't really worn kitsuke in a while and it just felt right doing it...

Enjoy!

Wednesday, 30 June 2010

my latest purchases!

Monday morning was a good day for me! It was a good day because, after a considerable break, I finally got to buy something from Ebay:

1. purple hakata obi!

I fell in love with it as soon as I saw the listing, and wasn't going to let it go without at least trying; I was lucky!


2. my first houmongi, with a ume branch design:


and a little detail:


So, like I said, Monday was a good day for me! Now I just can't wait until everything gets to Romania..

Sunday, 13 June 2010

The enigma behind geisha tsunodashi musubi

hello again everyone!

I am writing this tutorial based on a kind request of a fellow IG-er, and if it will be helpfull for other people, even better.

The enigma behind geisha tsunodashi musubi is uncovered!

Things to start with:

1. You will need either a hakata obi, or a stiffer Zentsuu Fukuro Obi or even a maru obi (fully patterned - and you'll see why) or any obi that is at least 3.85 m long and, the wider the better. Stiff nagoya-shaped obi won't really work.

2. As usual, I am doing it in front and slide it on the back afterwards.

3. i'll refer to knot as the actual thing, while "musubi" will be considered the final product of our work.

4. I will be doing it with 2 different types, covering both hakata and regular fukuro obi.

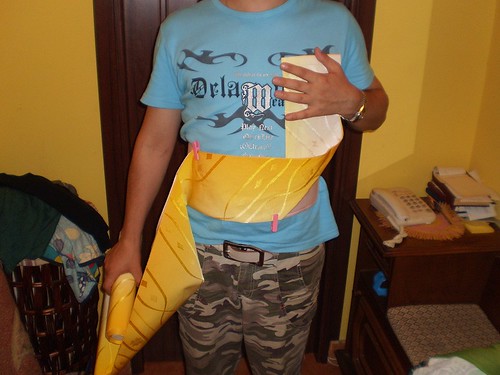
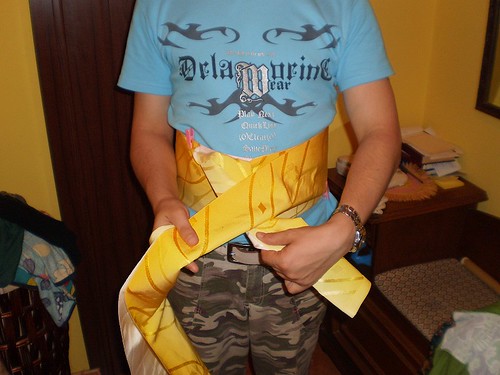
5. I am not wearing a kimono - way too hot outside, but I wore a t-shirt that matched both obi  :coy:

Let's get started!

I. Hakata Obi/Zentsuu Fukuro Obi/Maru Obi

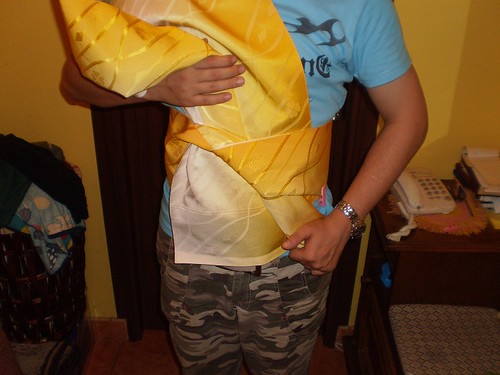
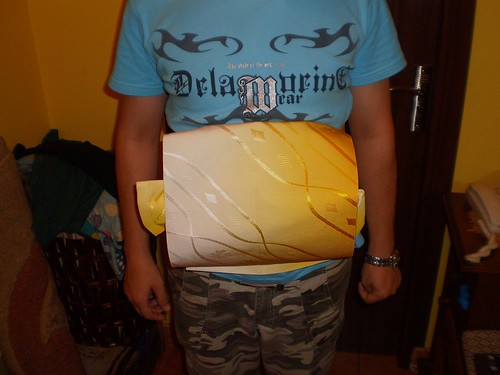
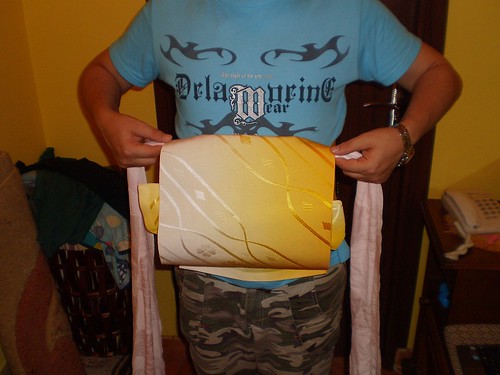
a. fold the tesaki part and, leaving out about 20 cm/just above your chest, wrap twice to your right, around your hips, finishing with the taresaki over the tesaki part:

b. make a knot, unfolding the taresaki part, just like below, leaving the lower part of the taresaki in the knot:


c. arrange everything so it looks straight.

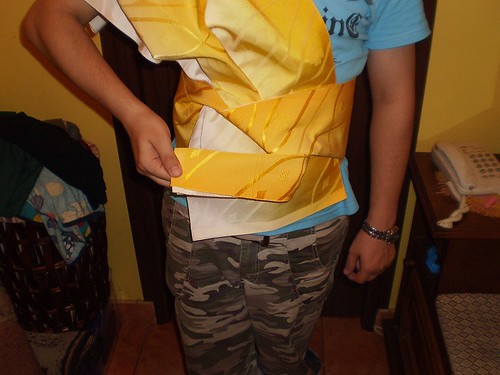
d. lift the upper part of the obi , so you have a clear view of the knot you made earlier.

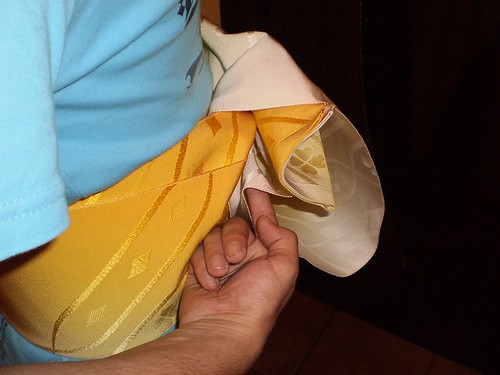
e. now comes the coolest part :): take the tesaki in your right hand and bring it over that knot:


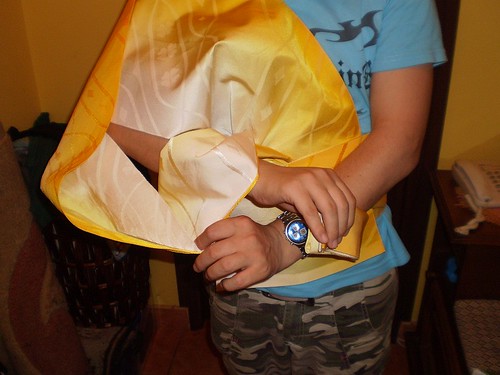
f. put your left hand through the loop you just created with the tesaki and catch the the inner layer of the upper part:


g. now pull both hands to side and tighten, until it looks like so:


h. congratulations! you just made a square knot or more specifically a clam musubi under the outer part of the hanging obi, whether you realize it or not!!!

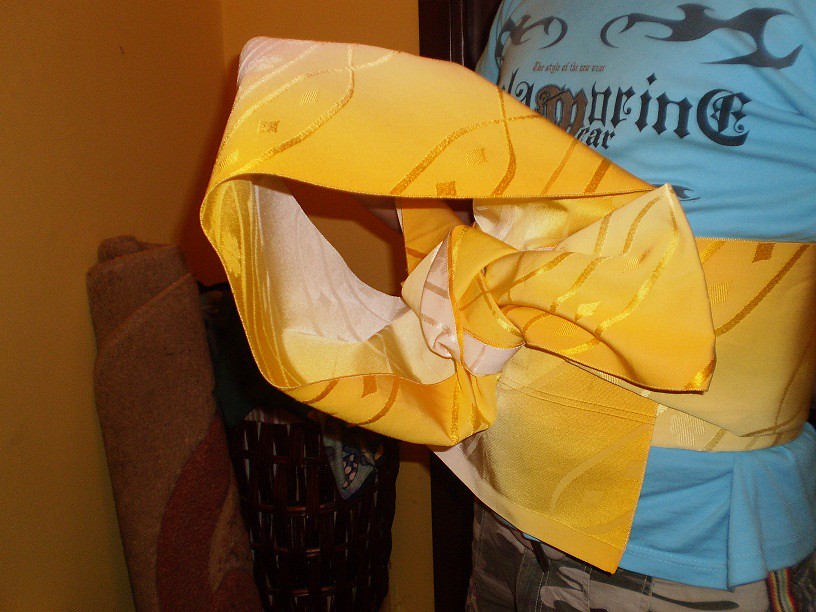
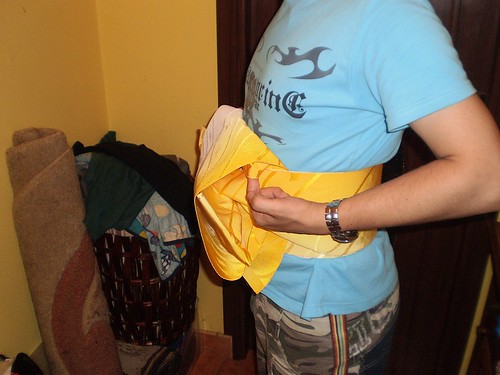
i. you should still be having part of the obi hanging; if not, start over the latter knot, and repeat until it looks like this, or similar:


j. another cool part :P : pinch the layer of the obi that just comes out of the knot and push it under the knot to either side; this will cause the knot to turn and lower a bit, but it's ok; that should happen:


k. push the obi fabric until it looks similar to this:


l. tadaaaaaa! you're almost done!


m. take your obiage and arrange the upper part of the musubi, then tie it in the back:


n. more arranging on the bow part...


o. now slide it in thhe back and make final adjustments! You're done!


II. Rokutsuu Fukuro obi

Since I know some of you only have a fukuro obi, usually 60% patterned, I figured out how to work around the unpatterned part. So here we go:

a. Fold your obi upto where the unpatterned part ends, towards the taresaki, and place that spot over your navel:


b. now wrap the tesaki once around your waist, to figure the amount you have to leave out on the tesaki:


c. now fold your obi again and wrap twice to your right, around your hips, finishing with the taresaki over the tesaki part.

d. follow steps b-d from above version.

e.now take the tesaki and fold it in half, just like i'm doing it here, and place it over the knot you made earlier:


f. follow steps f-o from the above version.


Tips for both versions:

 - it helps to have some karihimo at hand (temporary koshihimo)
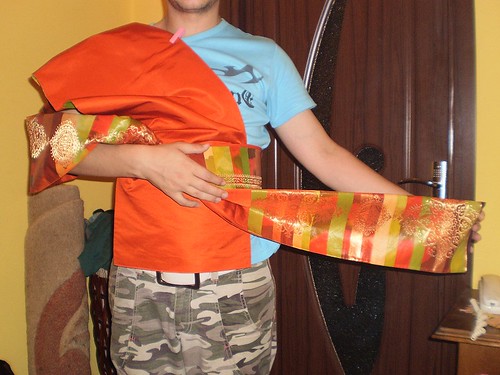
 - you can tie a koshihimo inside the obiage, just to make sure the whole thing stays in place and the tie the obiage loosely, so as not to damage it.
 - you can wear it slightly different by adding an obijime to your outfit; this will not only add a splash of color on the obi, but will also secure the obi that's pushed under the knot.

And, surprise, I have a third version, that will work better with rokutsuu fukuro obi. but I will attempt that maybe later tonight.

I hope this was useful to some of you. If there are any questions, I'm here :)