I am writing this tutorial based on a kind request of a fellow IG-er, and if it will be helpfull for other people, even better.
The enigma behind geisha tsunodashi musubi is uncovered!
Things to start with:
1. You will need either a hakata obi, or a stiffer Zentsuu Fukuro Obi or even a maru obi (fully patterned - and you'll see why) or any obi that is at least 3.85 m long and, the wider the better. Stiff nagoya-shaped obi won't really work.
2. As usual, I am doing it in front and slide it on the back afterwards.
3. i'll refer to knot as the actual thing, while "musubi" will be considered the final product of our work.
4. I will be doing it with 2 different types, covering both hakata and regular fukuro obi.
5. I am not wearing a kimono - way too hot outside, but I wore a t-shirt that matched both obi :coy:
Let's get started!
I. Hakata Obi/Zentsuu Fukuro Obi/Maru Obi
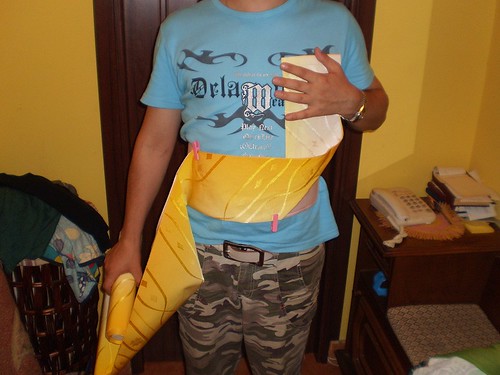
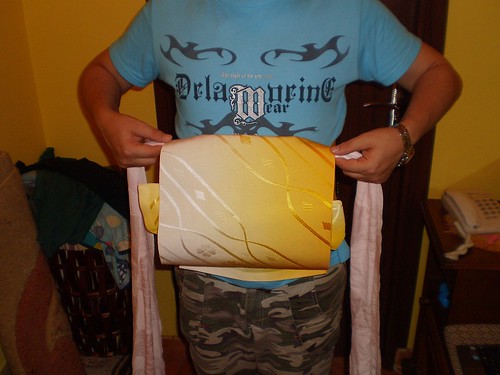
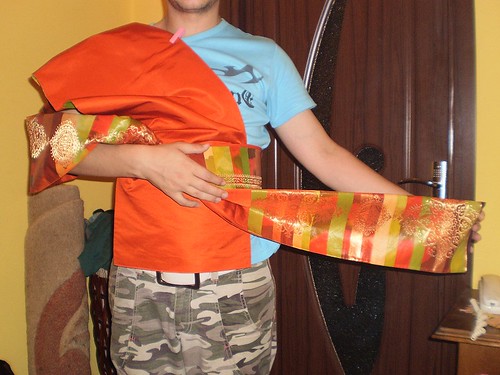
a. fold the tesaki part and, leaving out about 20 cm/just above your chest, wrap twice to your right, around your hips, finishing with the taresaki over the tesaki part:
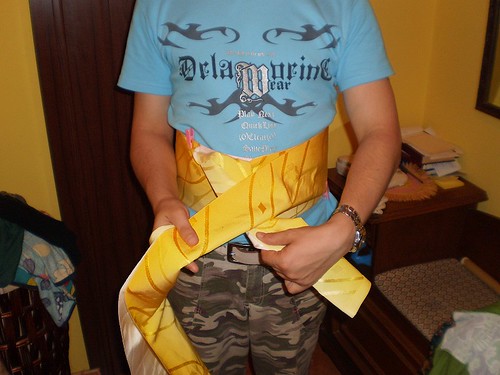
b. make a knot, unfolding the taresaki part, just like below, leaving the lower part of the taresaki in the knot:
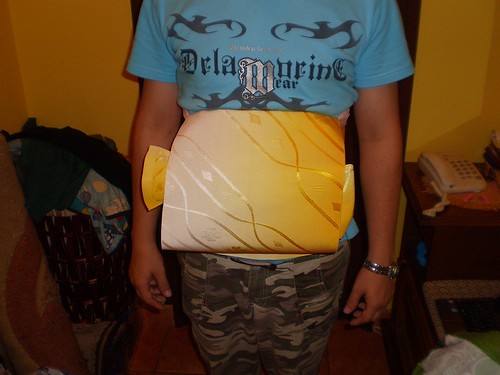
c. arrange everything so it looks straight.
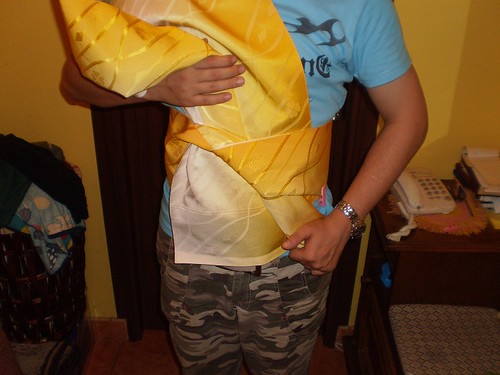
d. lift the upper part of the obi , so you have a clear view of the knot you made earlier.
e. now comes the coolest part :): take the tesaki in your right hand and bring it over that knot:
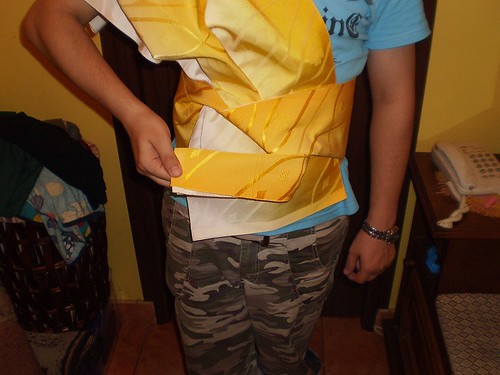
f. put your left hand through the loop you just created with the tesaki and catch the the inner layer of the upper part:

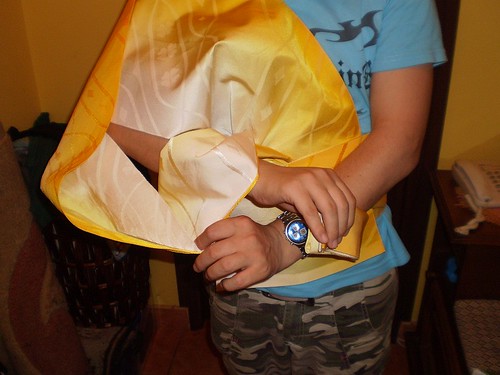
g. now pull both hands to side and tighten, until it looks like so:
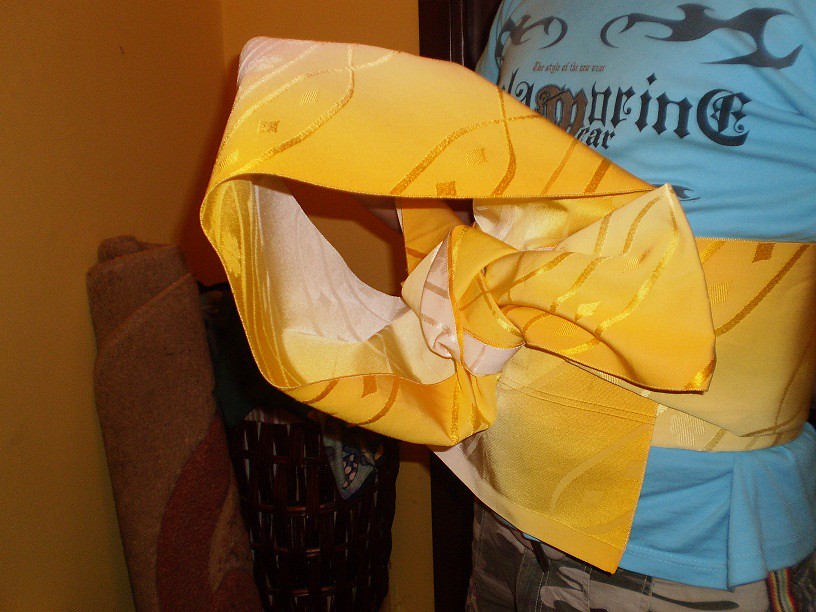
h. congratulations! you just made a square knot or more specifically a clam musubi under the outer part of the hanging obi, whether you realize it or not!!!
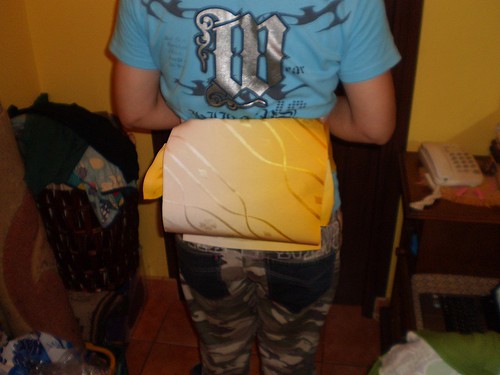
i. you should still be having part of the obi hanging; if not, start over the latter knot, and repeat until it looks like this, or similar:


j. another cool part :P : pinch the layer of the obi that just comes out of the knot and push it under the knot to either side; this will cause the knot to turn and lower a bit, but it's ok; that should happen:

k. push the obi fabric until it looks similar to this:

l. tadaaaaaa! you're almost done!

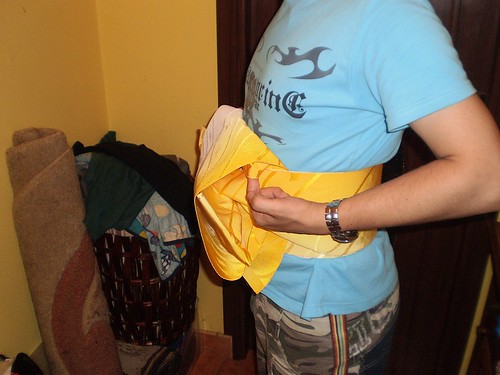
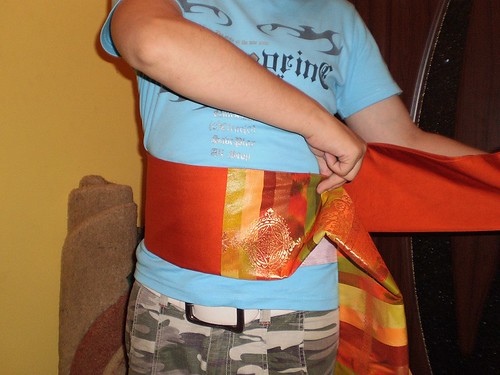
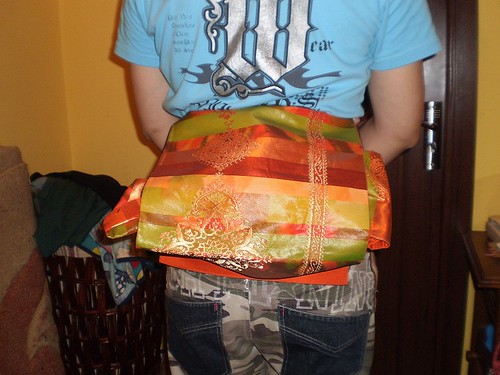
m. take your obiage and arrange the upper part of the musubi, then tie it in the back:
n. more arranging on the bow part...
o. now slide it in thhe back and make final adjustments! You're done!
II. Rokutsuu Fukuro obi
Since I know some of you only have a fukuro obi, usually 60% patterned, I figured out how to work around the unpatterned part. So here we go:
a. Fold your obi upto where the unpatterned part ends, towards the taresaki, and place that spot over your navel:
b. now wrap the tesaki once around your waist, to figure the amount you have to leave out on the tesaki:

c. now fold your obi again and wrap twice to your right, around your hips, finishing with the taresaki over the tesaki part.
d. follow steps b-d from above version.
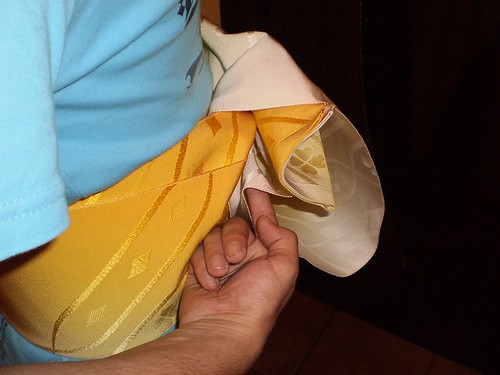
e.now take the tesaki and fold it in half, just like i'm doing it here, and place it over the knot you made earlier:

f. follow steps f-o from the above version.
Tips for both versions:
- it helps to have some karihimo at hand (temporary koshihimo)
- you can tie a koshihimo inside the obiage, just to make sure the whole thing stays in place and the tie the obiage loosely, so as not to damage it.
- you can wear it slightly different by adding an obijime to your outfit; this will not only add a splash of color on the obi, but will also secure the obi that's pushed under the knot.
And, surprise, I have a third version, that will work better with rokutsuu fukuro obi. but I will attempt that maybe later tonight.
I hope this was useful to some of you. If there are any questions, I'm here :)
Thanks for the tutorial, your shirt is a perfect match for both obi indeed ^_~
ReplyDeleteNext time I'll do kitsuke I'll try to do the tsunodashi.